Getting started with MIDI Sprout for MAC (beta)
MIDI Sprout for Mac (beta) is an adaptation of our iOS app made available for Mac computers. These instructions are based on a user having MIDI Sprout for iPhone hardware, which includes items 4, 5 and 6 below.
If you have a MIDI Sprout but don’t have the extra cables that come with the iPhone version, you will need a USB to MIDI cable. If you do not have this cable in your collection, we recommend the Creative EMU XMIDI 1x1 for this purpose.
What's In the Box?
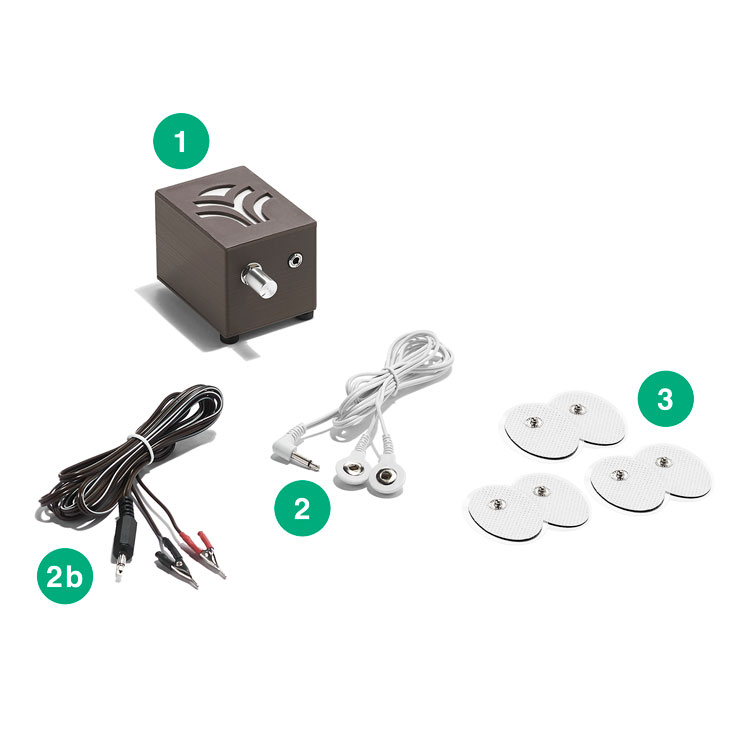
1. One MIDI Sprout
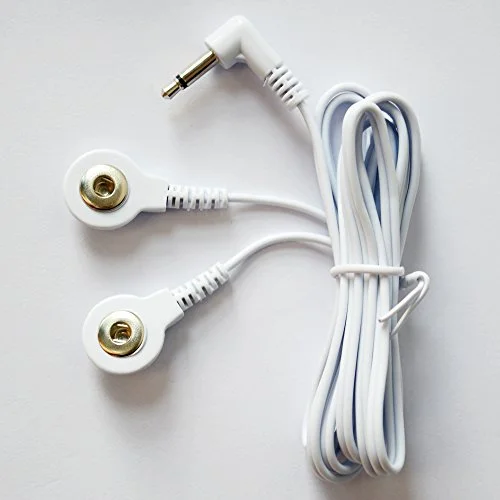
2. One pair of snap-on electrode leads (white)
2b. One pair of electrode clips for use on smaller plants. Included with MIDI Sprouts sold after August of 2018. Color of this cable may vary.
3. Three pairs of reusable electrode pads

4. One iConnectMIDI1+ device.
5. One Lightning to mini-USB inline connection cable to connect the iConnectMIDI+ to an iOS device.
6. One USB-A to mini-USB cable to connect the iConnectMIDI+ to a Mac or PC computer.
*batteries not included
MIDI SPROUT FEATURES
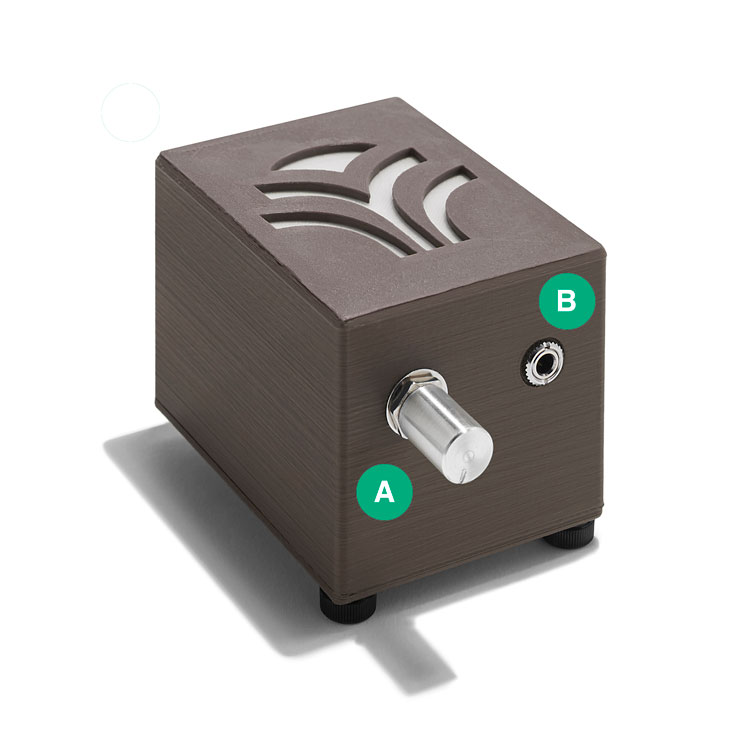

A) ON/OFF + sensitivity knob. Turn clockwise to turn on, counterclockwise to turn off.
Greatest sensitivity is just past the ON position. Lowest sensitivity is established when turned all-the way clockwise.
B) DC 3.5mm input for electrode leads
C) MIDI Port to connect to iOS device via an iConnectMIDI+ (included with MIDI Sprout for iPhone) or to a synthesizer or DAW via MIDI cable.
INSTRUCTIONS
Download the free MIDI Sprout Mac App (beta).
Right-click the file in your downloads and select “Open”
You will get prompted with a message asking if you’re sure you want to open this. Click “Open” from the prompt. Note that if you do not right-click on the file from the Finder, your computer may not open the file. You will only have to do this the first time you open the app.
Connect the iConnectMIDI+ (4 above) to the USB-A to mini-USB cable (6 above)
Insert the white (input) jack from the iConnectMIDI+ into the MIDI port (C above) on the back of the MIDI Sprout.
Insert the USB jack into the USB port on your Mac
Prepare two leaves on your plant by gently cleaning them with soapy water (most plants purchased from nurseries and department stores are covered by fungicidal gel that can interfere with connection to the MIDI Sprout)
Remove a pair of electrode pads (3 above) from their bag, keeping the plastic protectors on the pads.
Connect the snaps from the leads (2 above) onto the back of the electrode pads. (it’s best to connect the snaps to the pads before placing them on your plant so as to avoid applying excess pressure on the leaf during the snap-on process)
Remove the plastic protectors on the electrode pads and affix them to the leaves. Then put the plastic protectors back into the bag for the pads.
Turn on your MIDI Sprout by turning the knob (A above) on the front of the device clockwise, This knob determines sensitivity of your MIDI Sprout, with its greatest sensitivity in the position closest to the ON position and it’s lowest sensitivity when turned fully clockwise.
You should now see the logo on the MIDI Sprout app on your Mac lighting up and hear the music of your plant!

TIPS FOR ELECTRODE USE AND REMOVAL FROM PLANTS
ELECTRODE PADS VS. CLIPS
The electrode pads that come with your MIDI Sprout are reusable and, in most cases, are safe to leave on your plant for months at a time.
The electrode clips (included with MIDI Sprouts after August 2018) are not intended for long-term use on plants. These are best used on plants that have leaves that are too small or delicate for pads. They also come in handy when using MIDI Sprout in situations where you want to switch from one plant to another quickly and easily.
SELECTING A PLANT OR LEAF
Is the leaf you want to connect to larger than the electrode pad or clip? It’s best to be working with a larger leaf as this will provide more variation in conductivity and it will also be easier to remove your electrodes when you’re done listening.
Is the leaf / plant strong enough to hold the electrode/clip or will it the electrode put stress on the plant and weigh it down? Using MIDI Sprout with a plant is a way of engaging in a conversation or partnership with your plant. Don’t stress it out. If it’s too small to handle the weight of the electrodes, let it be.
REMOVING ELECTRODE PADS FROM PLANTS
Always remove the electrode pad by peeling it off of the leaf from the stem or branch towards the end of the leaf. This method works best with the structure of a leaf to ensure that it isn’t torn.
Always support the leaf near the stem by holding it with one hand while peeling with the other. This ensures you don’t pull the leaf from its plant
Be patient and take your time. It may sometimes take up to a minute to remove an electrode pad in a way that ensures you do no damage. Take this as an opportunity to thank your plants for singing to you. They will surely be happy you’ve taken this extra time.
Support and Resources
Troubleshooting
Have you tried all of the above and your MIDI Sprout isn't performing? Visit our troubleshooting page.